|
Talk to Midlothian Camera Club February 10, 2009 |
|
Thank you. Tonight: (A) 'Exposure' (B) 'The History of Photography' First ...
Please ask questions - now or later |
||||||||||||||||||||||
|
0 |
||||||||||||||||||||||


|
1. |
|
Under-exposure and Over-exposure |
|
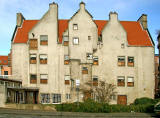
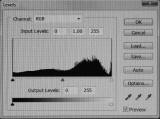
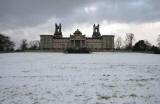
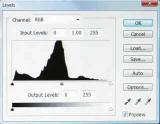
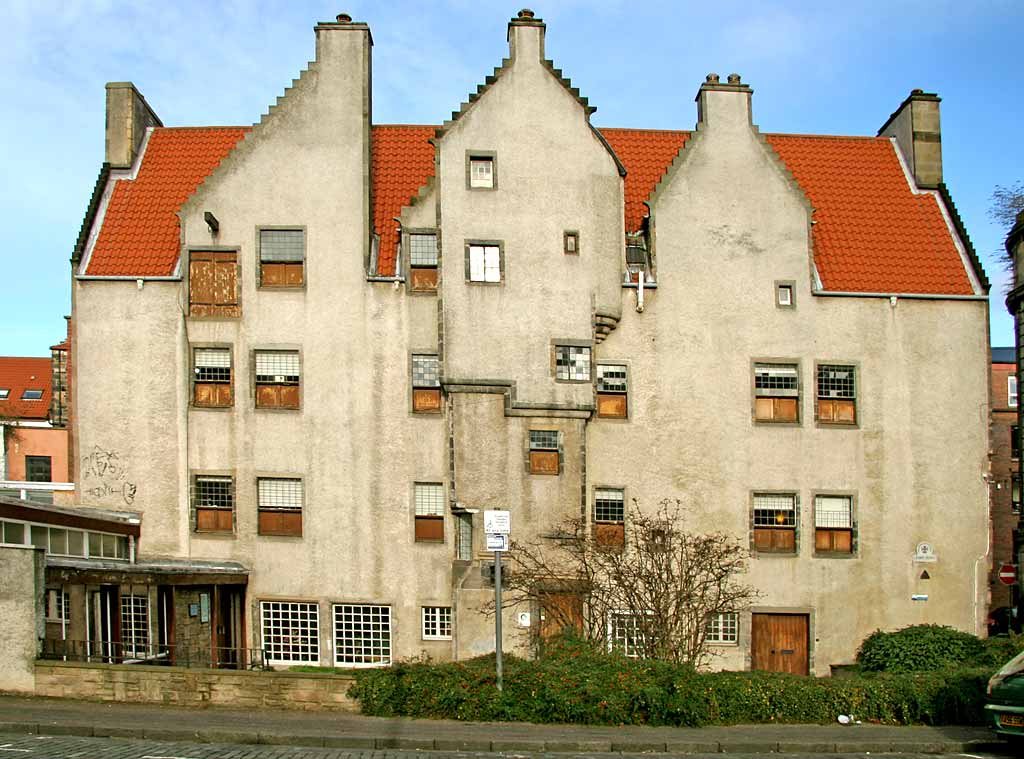
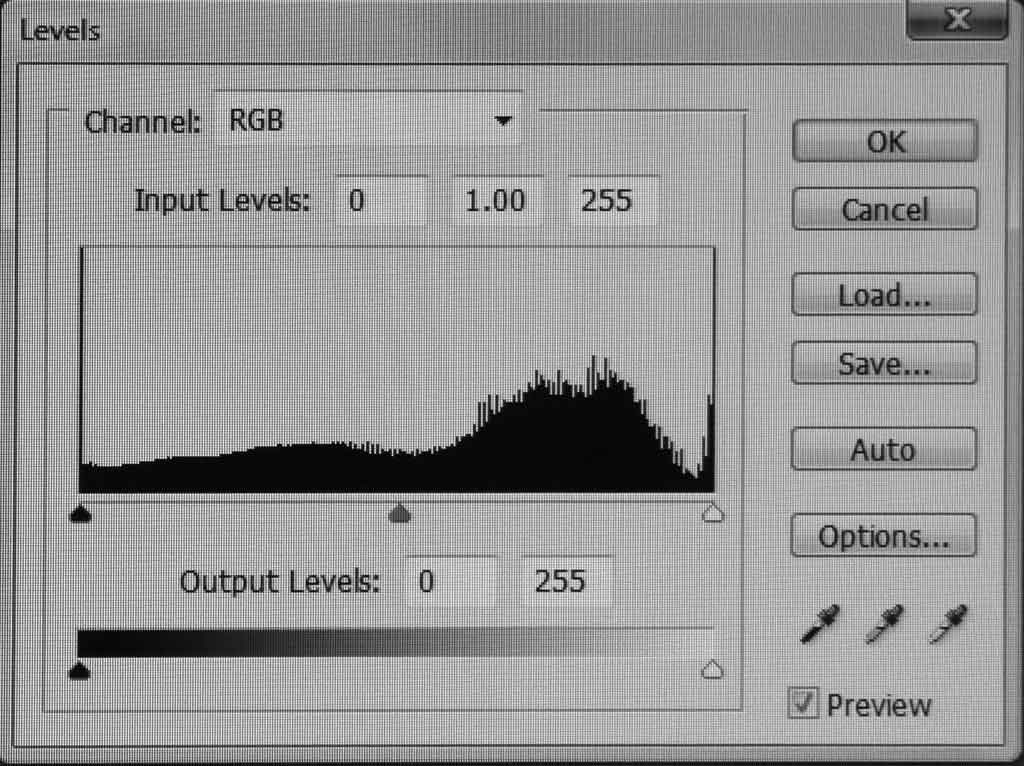
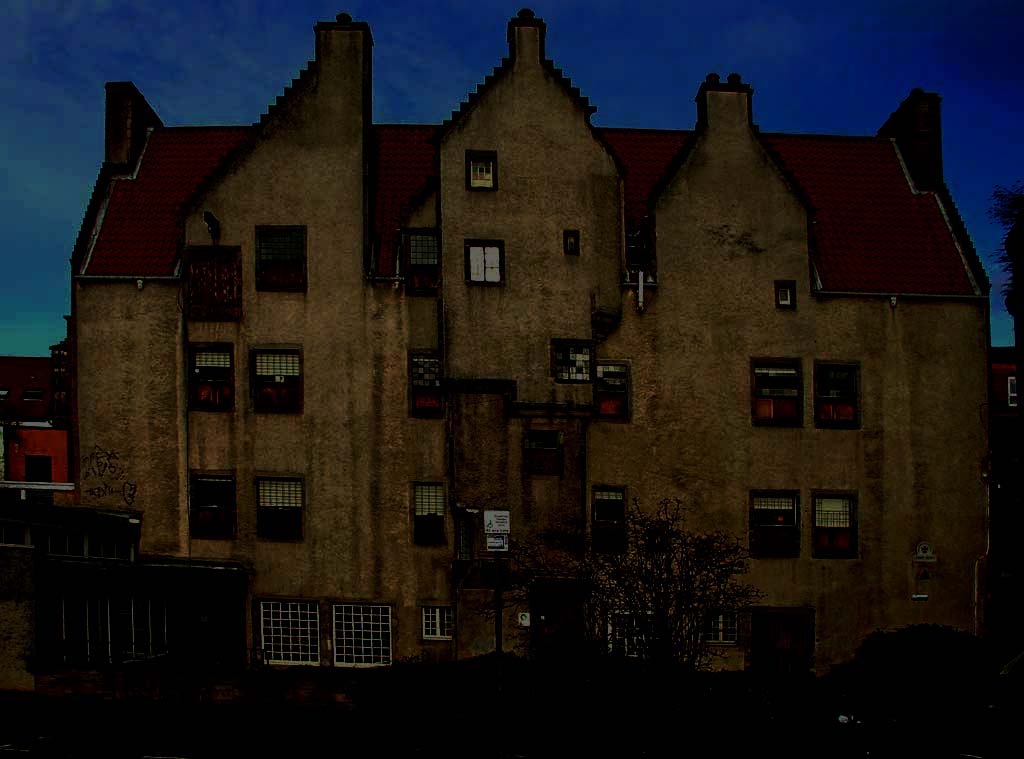
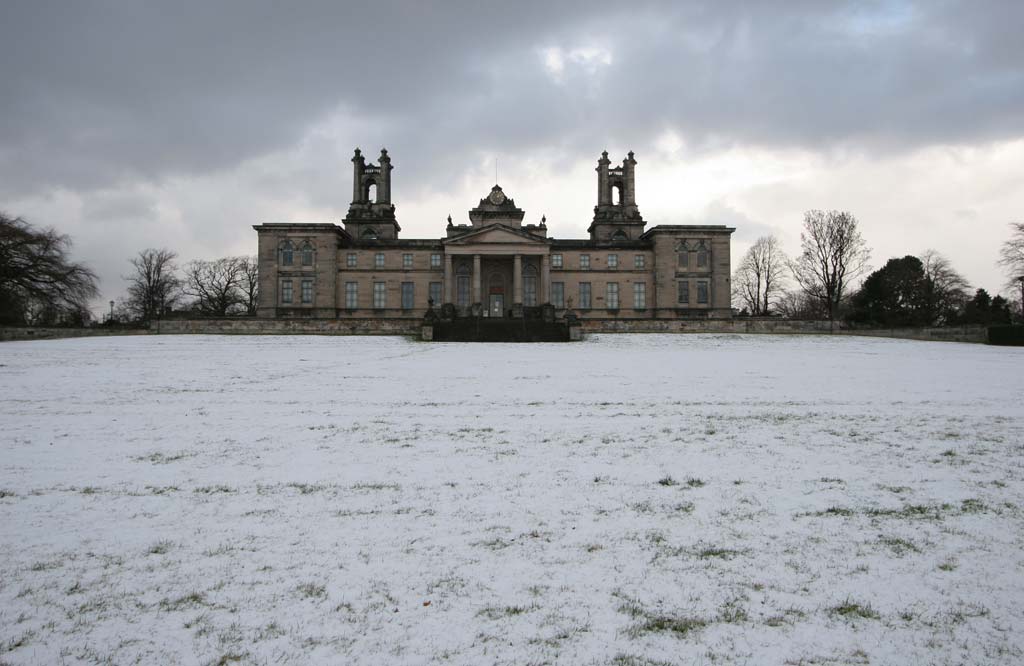
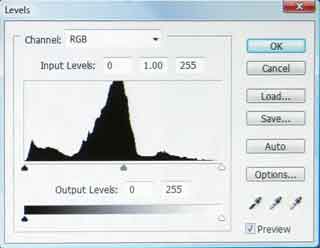
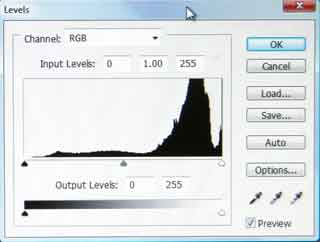
This photo has been exposed correctly.
© Copyright: Peter Stubbs peter.stubbs@edinphoto.org.uk Photograph taken November 1, 2005 Levels chart for the correctly exposed photo
© Copyright: Peter Stubbs - please contact peter.stubbs@edinphoto.org.uk
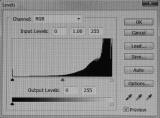
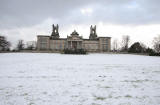
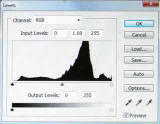
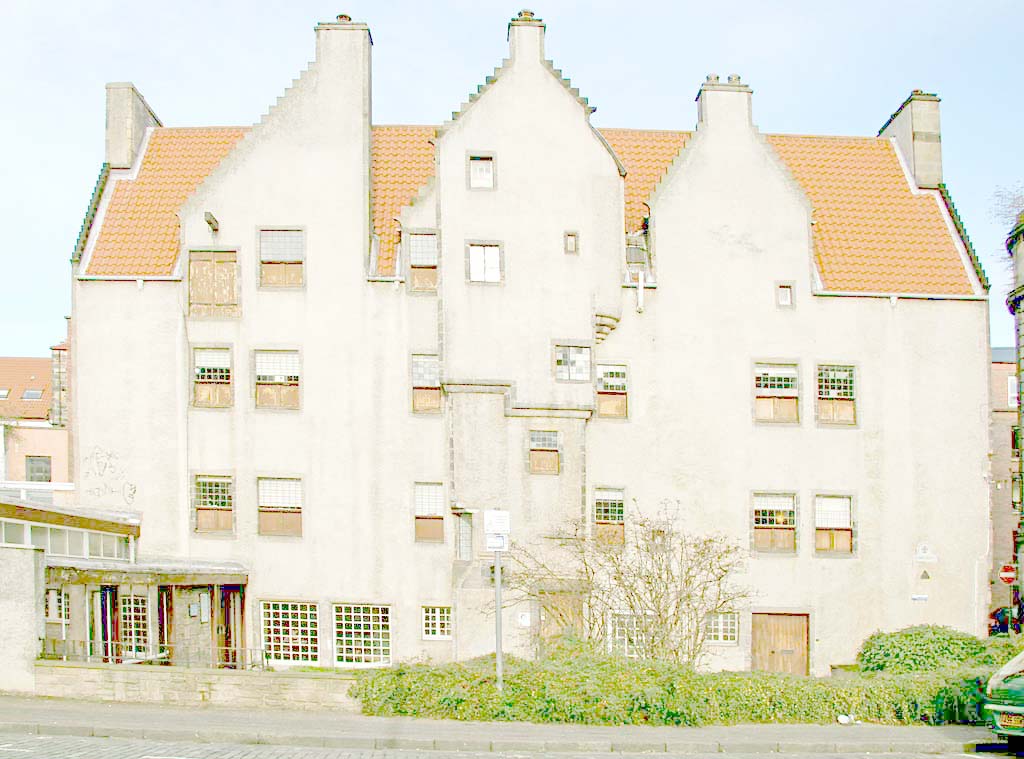
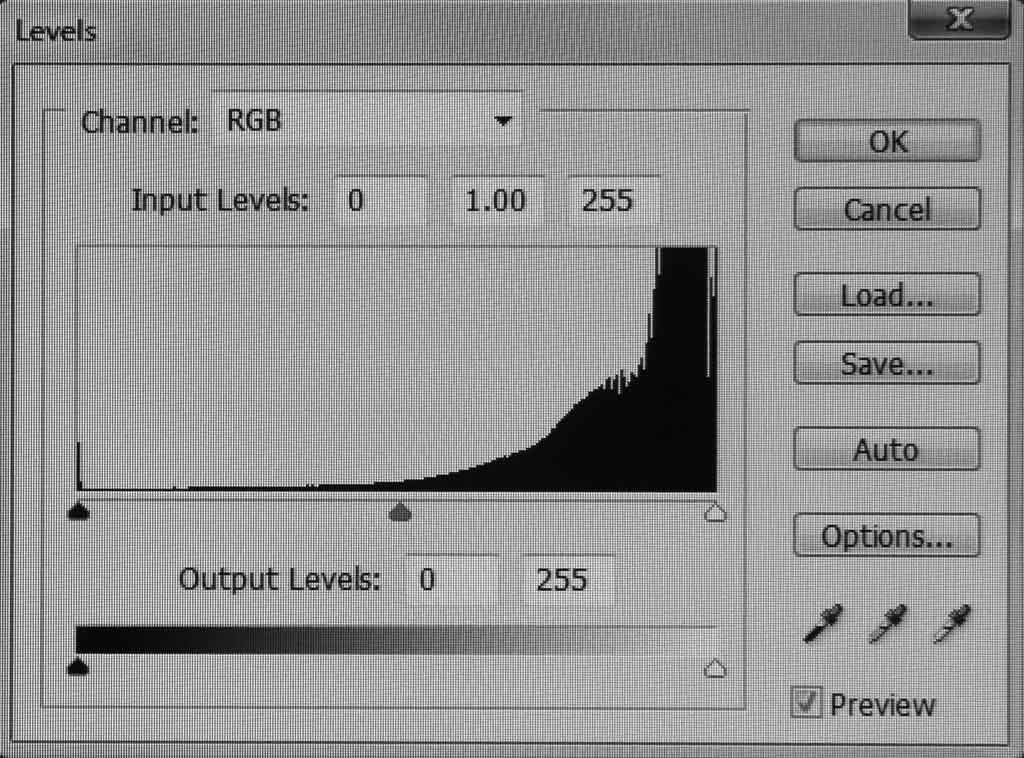
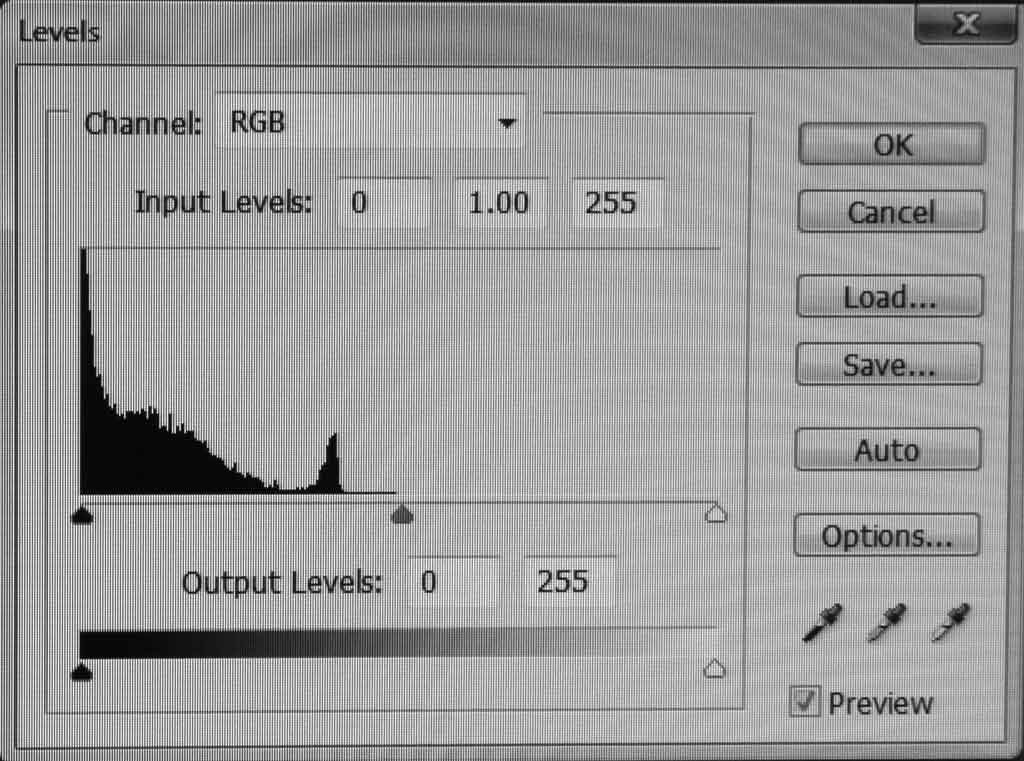
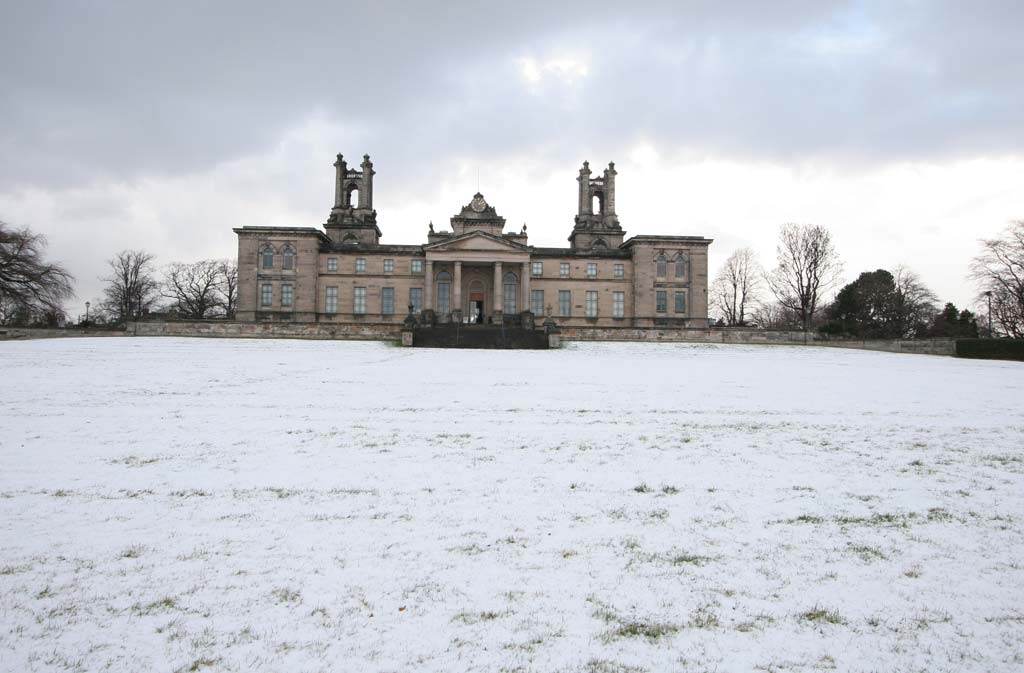
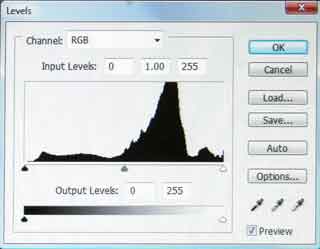
This photo is too light. It has been over-exposed
© Copyright: Peter Stubbs peter.stubbs@edinphoto.org.uk Photograph taken November 1, 2005 Levels chart for the over-exposed photo
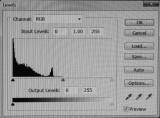
© Copyright: Peter Stubbs - please contact peter.stubbs@edinphoto.org.uk This photo is too dark. It has been under-exposed
© Copyright: Peter Stubbs peter.stubbs@edinphoto.org.uk Photograph taken November 1, 2005 Levels chart for the under-exposed photo
© Copyright: Peter Stubbs - please contact peter.stubbs@edinphoto.org.uk This photo is light. But is correctly exposed
© Peter Stubbs www.edinphoto.org.uk Photo taken February 7, 1996
|
|
Correcting Over- / Under-exposure
|
|
1 |
|
2. |
|
|
History |
|
|
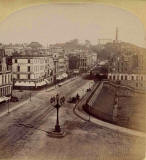
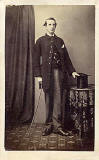
The theory remains the same. Equipment and materials continue to change. Now, more latitude in materials and more automation. Exposures were for several minutes. Photography of moving subjects was not possible. © Copyright: For permission to reproduce, please contact peter.stubbs@edinphoto.org.uk Head-stands were used in studios to keep subjects still. Not many photos of people smiling!
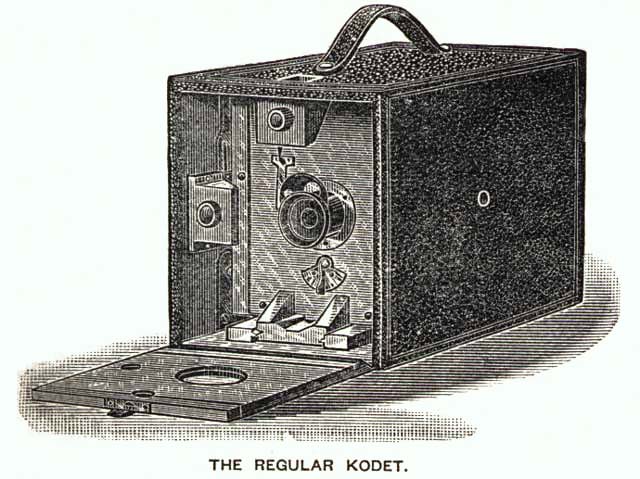
© author of www.cartedevisite.co.uk © author of www.cartedevisite.co.uk Not possible to photograph moving subjects. Photography and printing in winter difficult - too dull. 1890s New films allowed exposures of a fraction of a second. Hand-held cameras became popular. More amateurs took up photography. Eastman Co - Regular Kodet camera - 1890s
© Reproduced by courtesy of Edinburgh Photographic Society
© Reproduced by courtesy of Edinburgh Photographic Society Mid-1900s
Now Fully automatic cameras - exposure is less of a problem. Digital Cameras - more scope for experimenting. Digital Cameras - more scope for correcting. |
|
|
2 |
|
3. |
|
ISO - Time - Aperture |
|
© Copyright: For permission to reproduce, please contact peter.stubbs@edinphoto.org.uk
© Copyright: For permission to reproduce, please contact peter.stubbs@edinphoto.org.uk Examples SUNNY DAY: Perhaps 1/250 sec, f8, 100 ISO DULL WEATHER: What to change? ASSUME: '3 stops duller i.e. only 1/8 of light WHAT CHANGE is needed? EITHER 1. longer time e.g. 1/30 sec - camera shake? OR 2. wider aperture e.g. f2.8 - depth of field? OR 3. higher ISO e.g. 800 ISO - grain / noise? OR 4. some combination of the above changes. INDOORS: long exposure? - Perhaps 1/2 sec, f4, 400 ISO Use tripod or other support Use Flash? Try it 'off camera'
|
|
3 |

|
4. |
|
ISO |
|
Film and Digital Material Speeds: e.g. 100 ISO, 200 ISO, 400 ISO, 800 ISO, 1600 ISO If you increase the ISO, you can use a shorter speed.
A photo needing 1/2 sec at 100 ISO Higher ISO
GOOD
BAD Experiment, and see how the quality varies for different ISO settings
I usually leave my camera set to 100
ISO. |
|
4 |
|
5. |
|
Time |
|
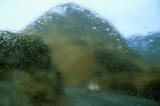
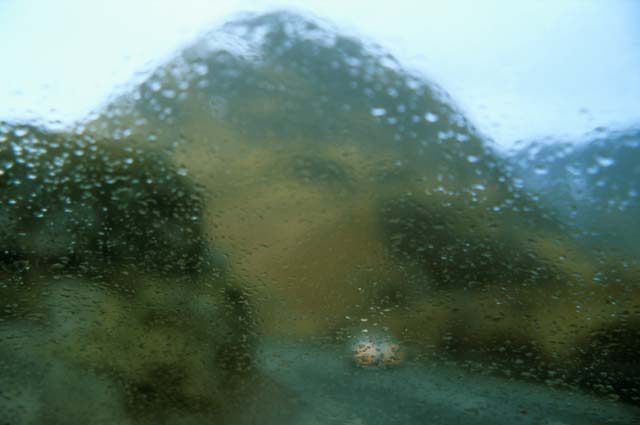
How Long? Sport may need short shutter speed to capture the action. e.g. 1/1000 sec Shutter speed for moving people and vehicles depends on: - the speed of the movement. - the distance from the camera. - whether the subject is moving towards the camera or across the frame. - the effect you want to create. e.g. Do you really want to freeze the action? 'Mind the Gap' © Peter Stubbs - please contact peter.stubbs@edinphoto.org.uk Photograph taken January 12, 1995 Camera held still for 1/8 second f6.7
© Copyright: For permission to reproduce, please contact peter.stubbs@edinphoto.org.uk Camera panned for 1/6 second f22
© Copyright: For permission to reproduce, please contact peter.stubbs@edinphoto.org.uk Camera panned for 1/125 sec f5.6 70-210mm lens @210mm
© Copyright: Peter Stubbs - please contact peter.stubbs@edinphoto.org.uk Photograph taken September 22, 1990 Camera still 1/250 sec f4 70-210mm lens @210mm
© Copyright: Peter Stubbs - please contact peter.stubbs@edinphoto.org.uk Photograph taken September 22, 1990 Waterfalls, fountains, and other moving water:
- Short shutter speeds capture all the
droplets and spray, sharply. e.g. 1/1000 sec
- Long shutter speeds turn the water
'milky' e.g. 1/30 to several seconds
© peter.stubbs@edinphoto.org.uk - Photograph taken July 2001
|
|
5 |


|
6. |
||
|
Aperture |
||
|
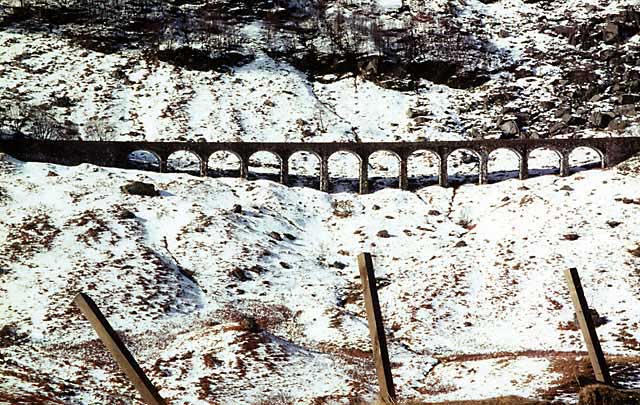
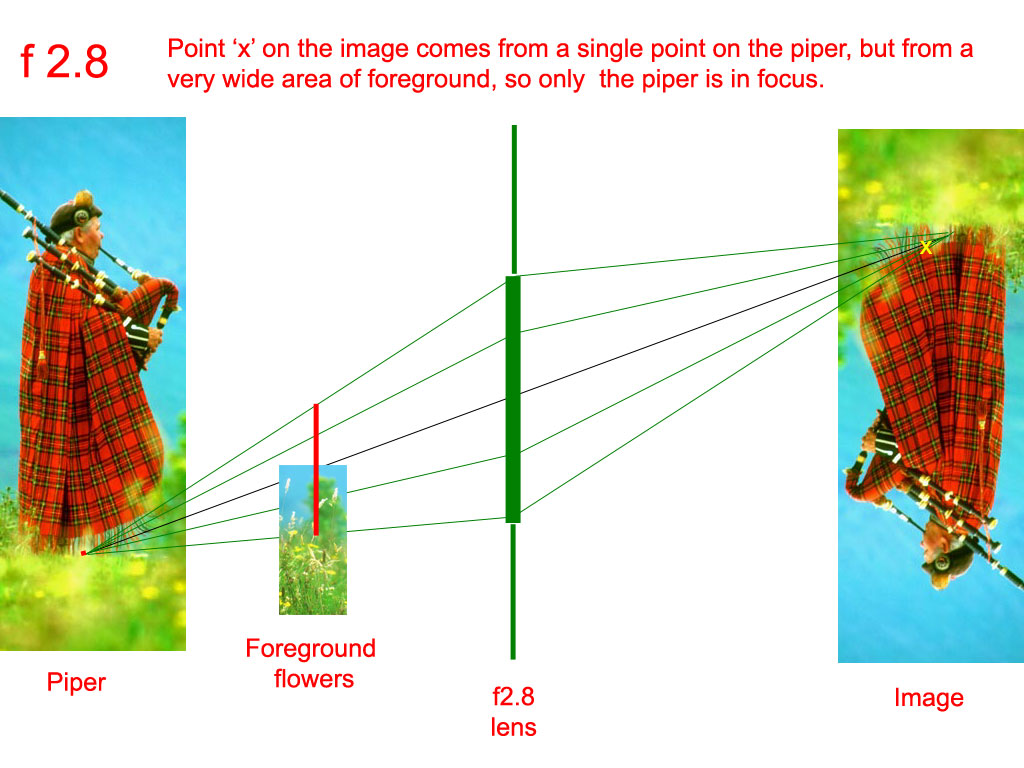
Depth of Field A small aperture, like f16, keeps most or all of a photo in focus. Here are two views of Glen Ogle with the fence posts and the viaduct both in focus.
© Copyright: Peter Stubbs - please contact peter.stubbs@edinphoto.org.uk
© Copyright: Peter Stubbs - please contact peter.stubbs@edinphoto.org.uk
A large large aperture, like f2.8, has a shallower depth of field, so keeps only the chosen area in focus. Here are three views on the road to Glencoe, with more selective focus. f2.8 - focus on the windscreen
© Copyright: Peter Stubbs - please contact peter.stubbs@edinphoto.org.uk
|
||
|
Relationship between Aperture and Shutter Speed SMALLER 'f' number (e.g. f2) = LARGER aperture = MORE LIGHT so needs SHORTER exposure All these give the same result: Examples: f2 1/1000 sec f2.8 1/500 sec f4 1/250 sec f5.6 1/125 sec f8 1/60 sec f11 1/30 sec f16 1/15 sec f22 1/8 sec
|
||
|
Why is the in-between value f5.6, not f6? - f8 is a measure of the diameter of the hole in the lens that lets in the light. - f4 is double the diameter of f8, so lets in 4x as much light as f8. - f5.6 is 1.414 ( = root 2 ) x the diameter of f8, so lets in 2x as much light as f8. Explanation: f2 2 x 2 = 4 f2.8 2.8 x 2.8 = 8 f4 4 x 4 = 16 f5.6 5.65 x 5.65 = 32 f8 8 x 8 = 64 f11 11.3 x 11.3 = 128 f16 16 x 16 = 256 f22 22.6 x 22.6 = 512 The intermediate values above have been rounded. e.g. 16 x 1.414 = 22.624, but this is described as f22. |
||
|
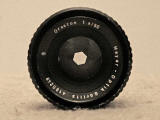
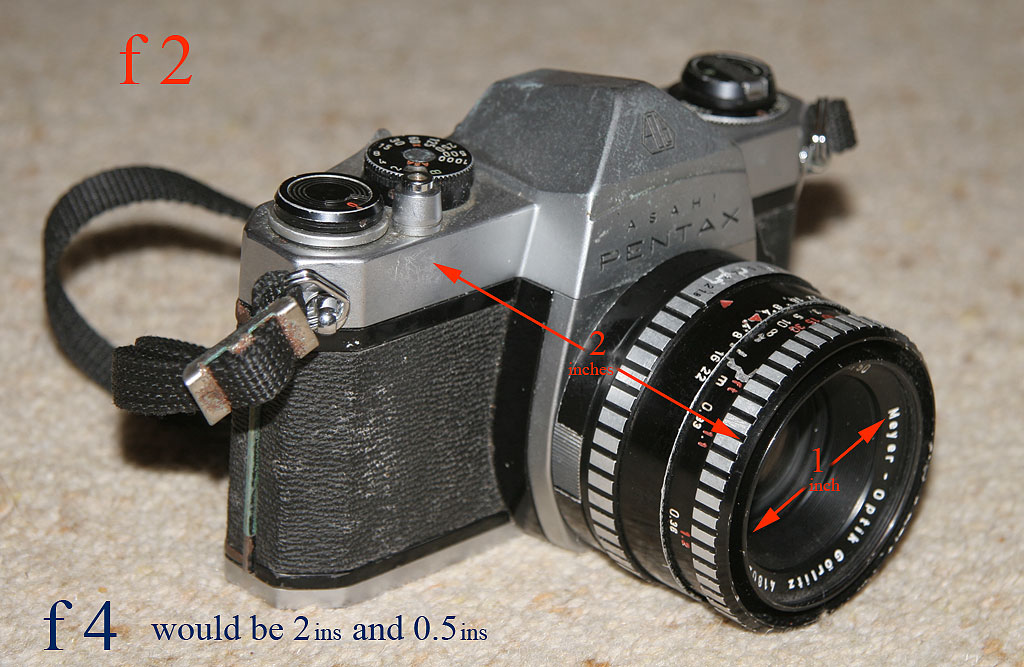
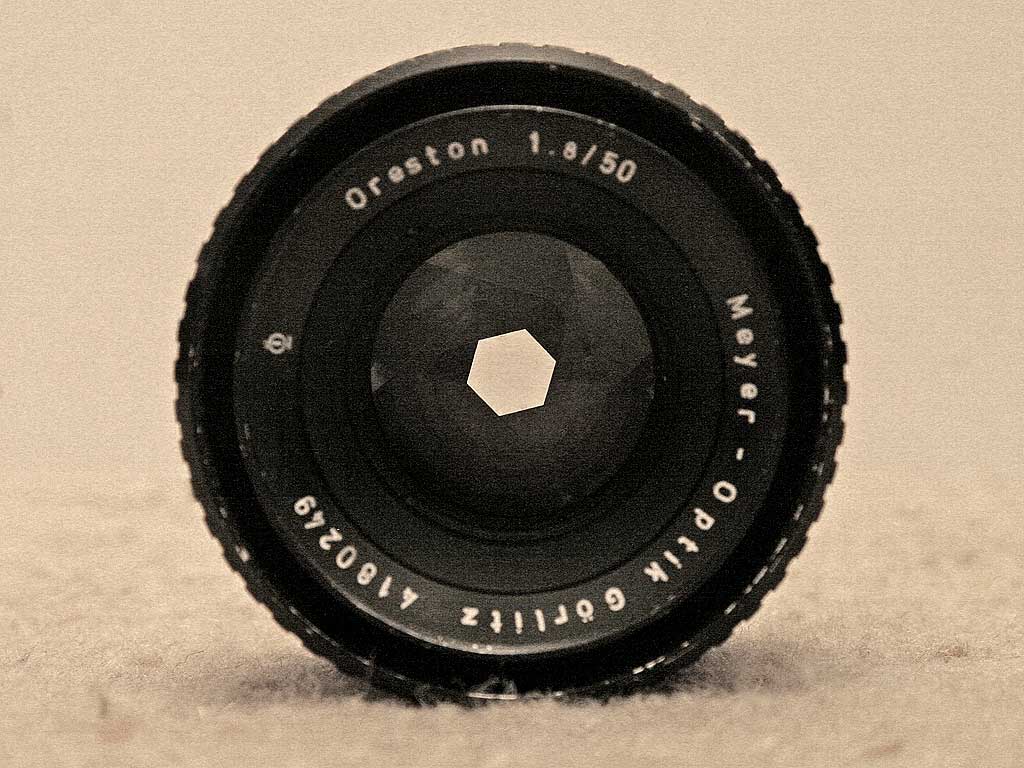
- f4 The focal length of the lens is 2 x the aperture. See red text on photo below. - f4 The focal length of the lens is 4 x the aperture. See blue text on photo below.
© Copyright: For permission to reproduce, please contact peter.stubbs@edinphoto.org.uk Standard lens: 50mm = 2" - Standard 2" lens with 1" aperture = f2 - Standard 2" lens with 1/2" aperture = f4 The photo below shows how the size of the hole changes when the aperture is changed. Here, the diameter of the aperture has reduced to about 1/3 inch ( or 1/6 of focal length, so = f6)
© Copyright: For permission to reproduce, please contact peter.stubbs@edinphoto.org.uk Telephoto lens: 500mm = 20" - Telephoto 20" lens with 10" aperture = f2. Much too bulky / heavy / expensive - Telephoto 20" lens with 5" aperture = f4. Still bulky / heavy / expensive
|
||
|
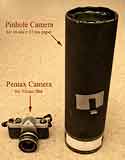
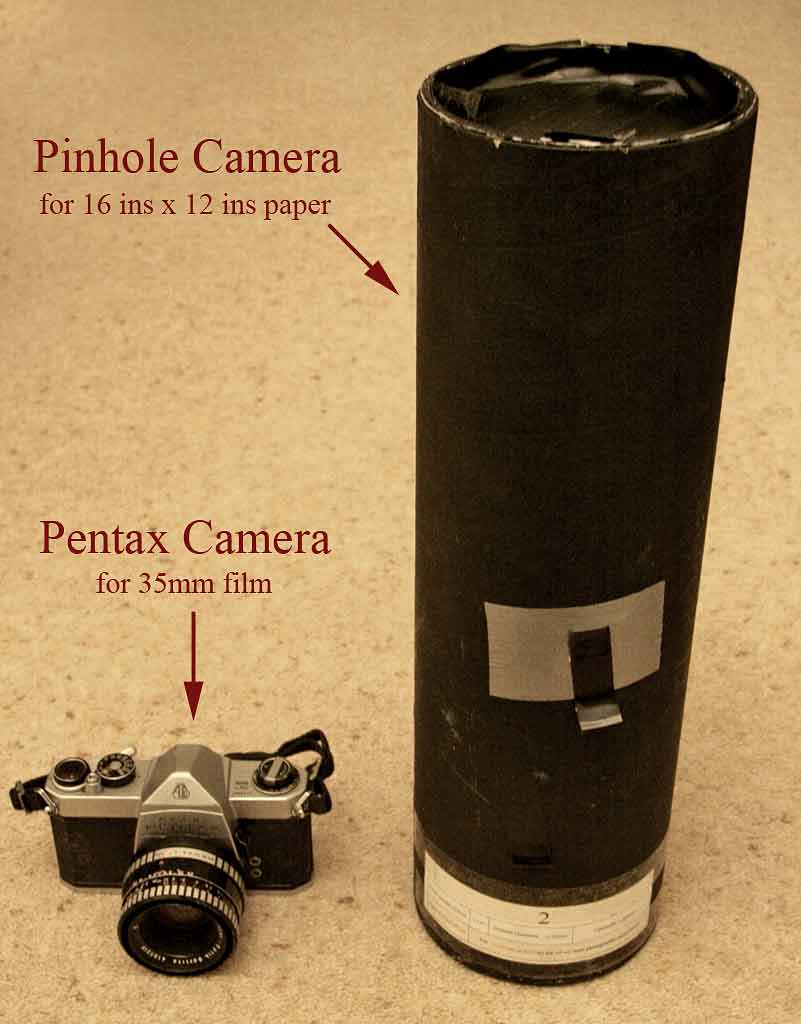
designed to hold 16 in x 12 in sheets of photographic paper, not film.
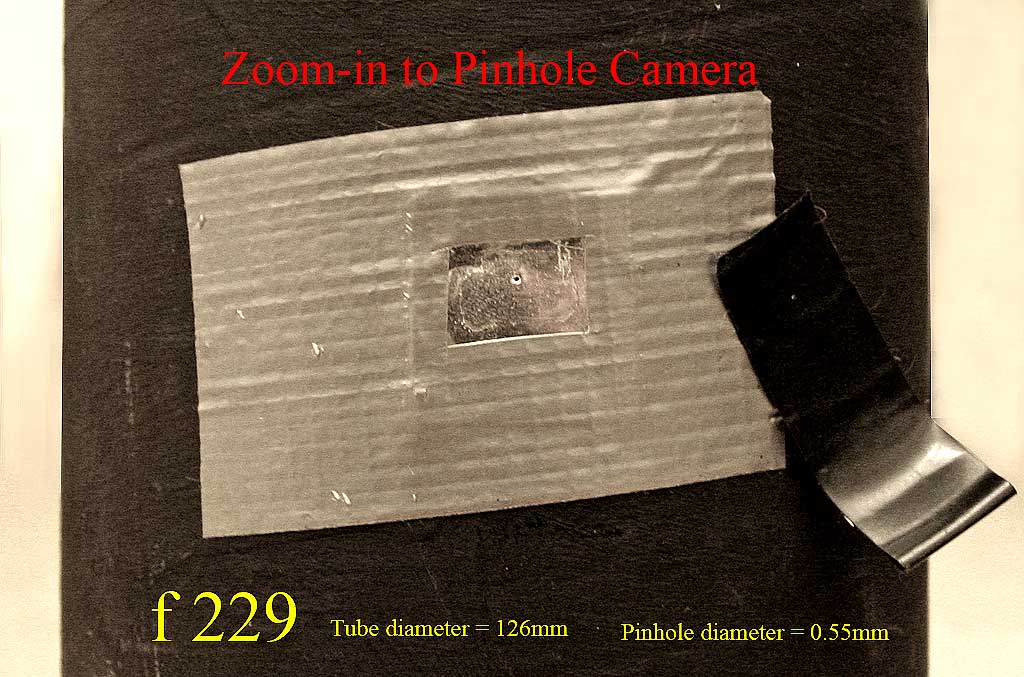
© Copyright: For permission to reproduce, please contact peter.stubbs@edinphoto.org.uk Zoom-in to look at the Pinhole
© Copyright: For permission to reproduce, please contact peter.stubbs@edinphoto.org.uk
|
||
|
6
|

|
7. |
||||||
|
Can you Trust the Camera? |
||||||
|
Often, YES ... BUT not always. 1. The camera assumes that a picture tone is mid-grey - Mid-grey is often a reasonable assumption - BUT LIGHT SUBJECTS - A snow scene or wedding dress at mid-grey looks wrong - Try 1 or 2 stops more exposure to make it look LIGHTER - 1 stop more = twice as much exposure. e.g at f8: 1/500 sec instead of 1/1000 sec. Photo 1: What the camera saw: 1/500*, f5.6
© Copyright: For permission to reproduce, please contact peter.stubbs@edinphoto.org.uk Photo 2: What the camera saw + 1 stop: 1/250, f5.6
© Copyright: For permission to reproduce, please contact peter.stubbs@edinphoto.org.uk Photo 3: What the camera saw + 2 stops: 1/125, f5.6
© Copyright: For permission to reproduce, please contact peter.stubbs@edinphoto.org.uk
DARK SUBJECTS - Dark subjects can also confuse the camera A photo in a coal cellar, or a shop front painted black, should not be grey. - Try 1 or 2 stops less exposure to make it look DARKER. 2. Can the camera cope with the range of brightness? - Squint at a scene to see the possible outcome. - Expose for the highlights. Don't lose detail in lightest parts. - Consider a graduated neutral density filter for the sky - On bright days, use 'fill in flash' outdoors - For portraits, consider using a reflector - If in doubt, bracket e.g at f8: 1/1000, 1/500, 1/250 sec. - Then use the best OR - combine more than one (possibly with HDR software) 3. Look at the levels chart on the back of the camera - Try exposure compensation and see how the chart changes. NOTE: Despite all the comments above, I find that it can be a good idea to ALSO take a photo at the exposure recommended by the camera. This may, in fact, turn out to be the best exposure, and with digital cameras there's no additional cost involved in taking an extra exposure. |
||||||
|
7 |
||||||
|
8. |
|
How to Set the Camera |
|
Full Auto Av - Aperture priority Tv - Shutter Priority Manual |
|
Full Auto - Usually reliable. - If the occasion is important and may difficult to 'go back and do it again e.g. a wedding, it may be a good idea to take a range of photos in 'full auto' mode, no matter what other photos are being taken. |
|
Aperture Priority
- Useful to keep control over the depth of
field.
- Maybe keep foreground and background in
focus on a landscape.
- Maybe isolate one person in a crowd, as
for some press photos. - Check on the shutter speed required. Be prepared to use a tripod.
- Historic rule was don't hand-hold for >
1/focal length
- Now with image stabiliser lens it is
possible to hand-hold for longer - Despite the above rule, it is surprising how much a tripod can help.
|
|
Shutter Priority - Useful where you want to use a particular time and depth of field is less critical. - for waterfalls or flowing water - for fast action in sport - for panning subjects
|
|
Manual - This can prevent the camera from doing what it wants to do, if you think it's going to get things wrong. e.g. - For copying photos, find the exposure using a 'grey card' then keep to that exposure for all photos, providing the lighting conditions do not change. This should give a true copy of the photos, rather than one where the lighter and darker pictures have been adjusted by the camera. - For panoramas, choose a day with no wide variations of light across the panorama. Find the exposure needed for an average part or important part of the scene. Set the camera to manual on that exposure for all settings. - For scenes that are fairly monochrome in a dark of light colour, e.g. snow or dark or light building, use a grey card, lit and angled in the same way as the subject, then use manual - OR for digital photography (with no extra film or processing to pay for) it may be easier to just bracket the photo and select the best later.
|
|
8 |
|
9. |
|
A Few Photos |
|
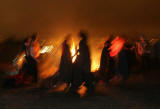
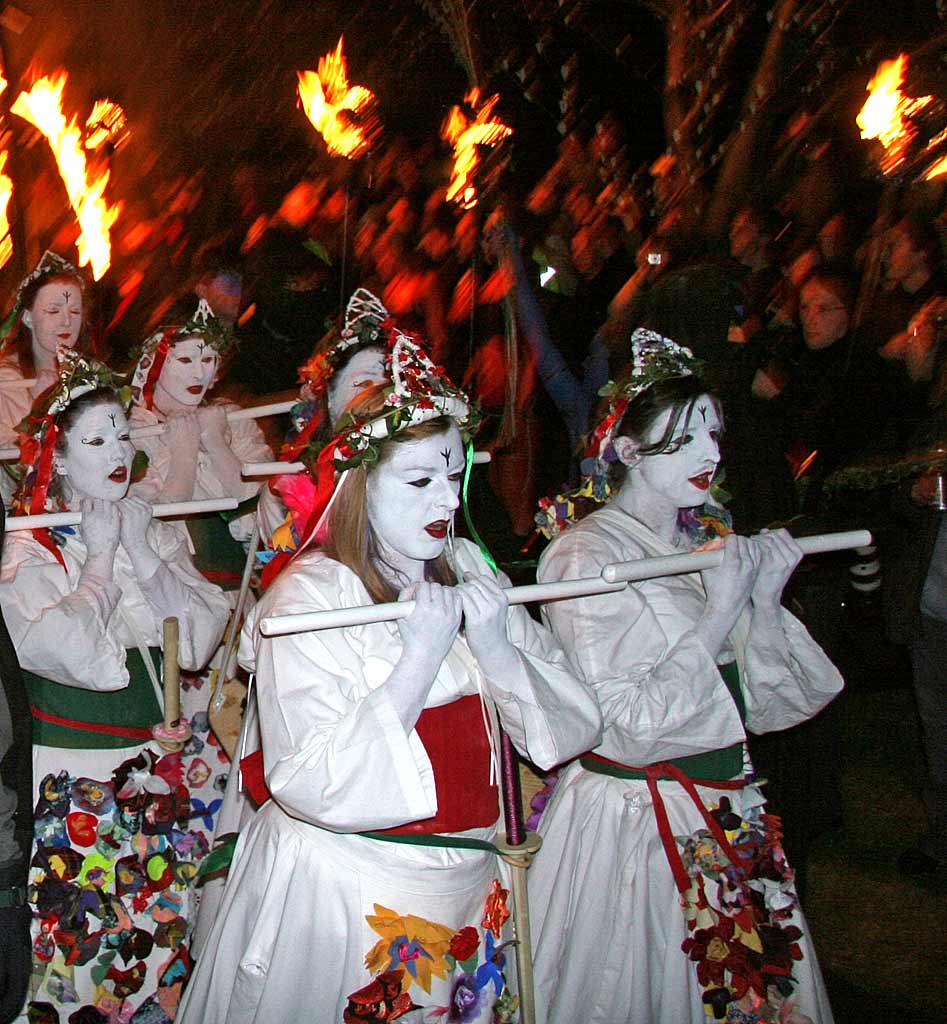
(a) Direct and Reflected Light (i) Flash lights the subject DIRECTLY - A brighter flash is needed if the subject is further away - Move 2x as far away: the flash has to be 4x as bright. - Move 3x as far away: the flash has to be 9x as bright. - Automatic flash can cope with this (within limits) - Automatic flash at an outdoor event at night is only likely to illuminate the head of the person in front, not the performers on stage in the distance. (bad) - Fill in flash, used for an outdoor portrait in bright light at daytime will fill in the dark shadows in the face, but will leave the background unchanged. (good) Beltane Festival - Movement from the camera and the dancers
© peter.stubbs@edinphoto.org.uk Photograph taken: May 1, 2008 at 1am 400 ISO but a lot of noise in the background Beltane Festival - Flash on aperture priority freezes the action in the foreground
© peter.stubbs@edinphoto.org.uk Photograph taken: April 30, 2006; 10.21pm (ii) Sun and Floodlighting lights the subject INDIRECTLY - Distance to the subject in a landscape does not affect the brightness. - Brightness depends on the colour and texture of different parts of the scene and whether they are in the sun or the shade. - Exposure for the moon is same as is needed for a fine day on earth. - Move further from a floodlit building and it still needs the same exposure. - So you can move closer to take exposure reading, then move back for photo.
|
|
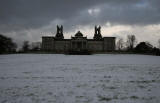
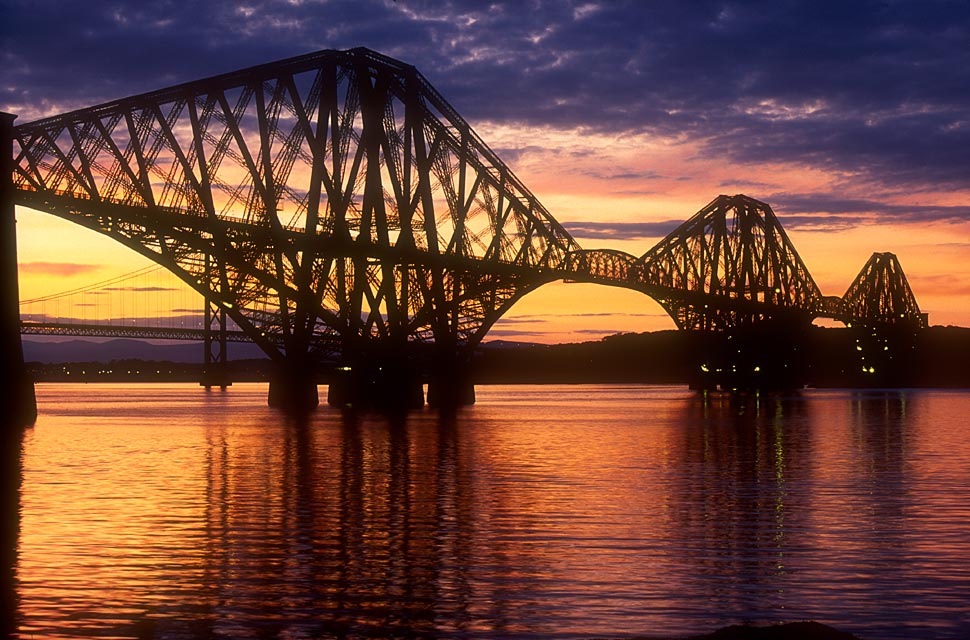
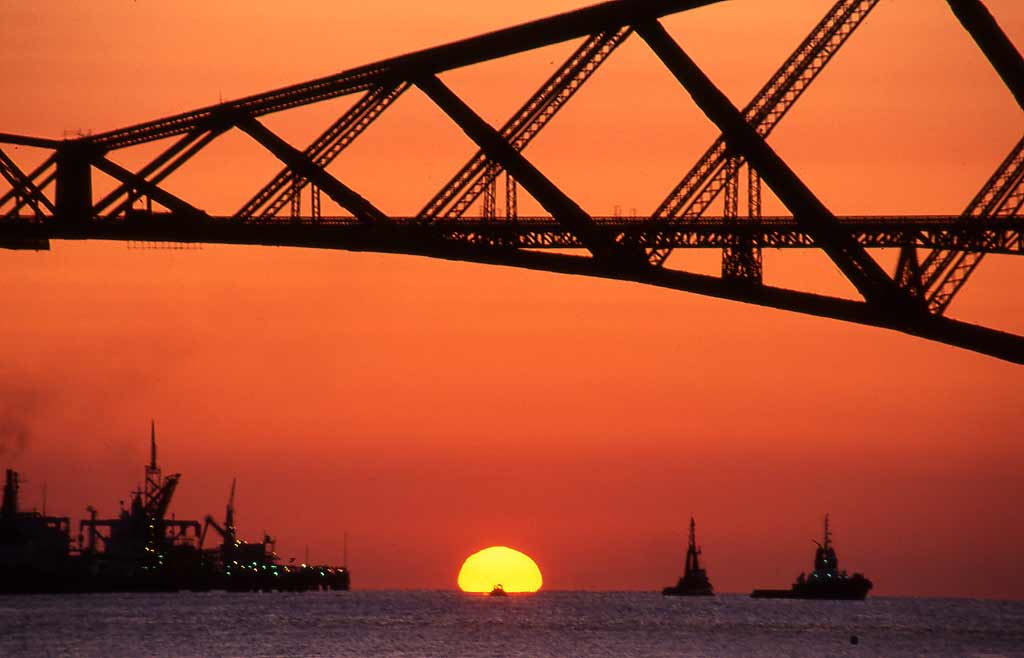
(b) Dusk and Dawn - Colour in the sky may last for only a few minutes - Photograph before the sky gets too dark / light
© Copyright: Peter Stubbs - please contact peter.stubbs@edinphoto.org.uk This photograph has been used on a CD cover.
© Copyright: Peter Stubbs - please contact peter.stubbs@edinphoto.org.uk Photo taken: August 14, 1994
|
|
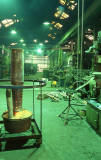
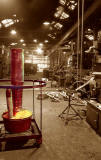
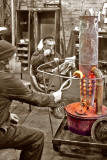
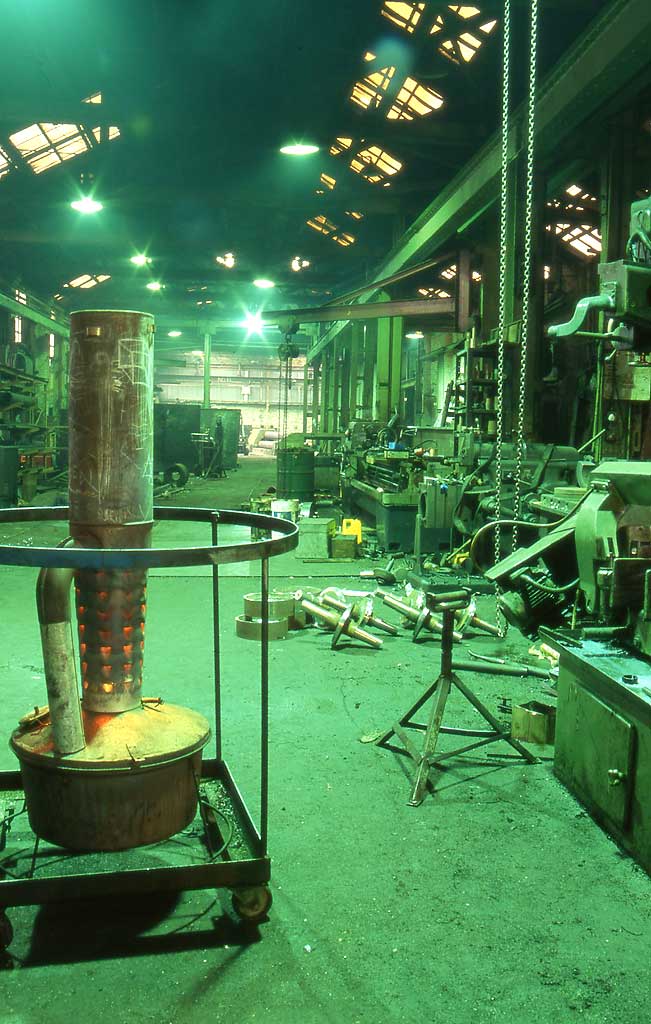
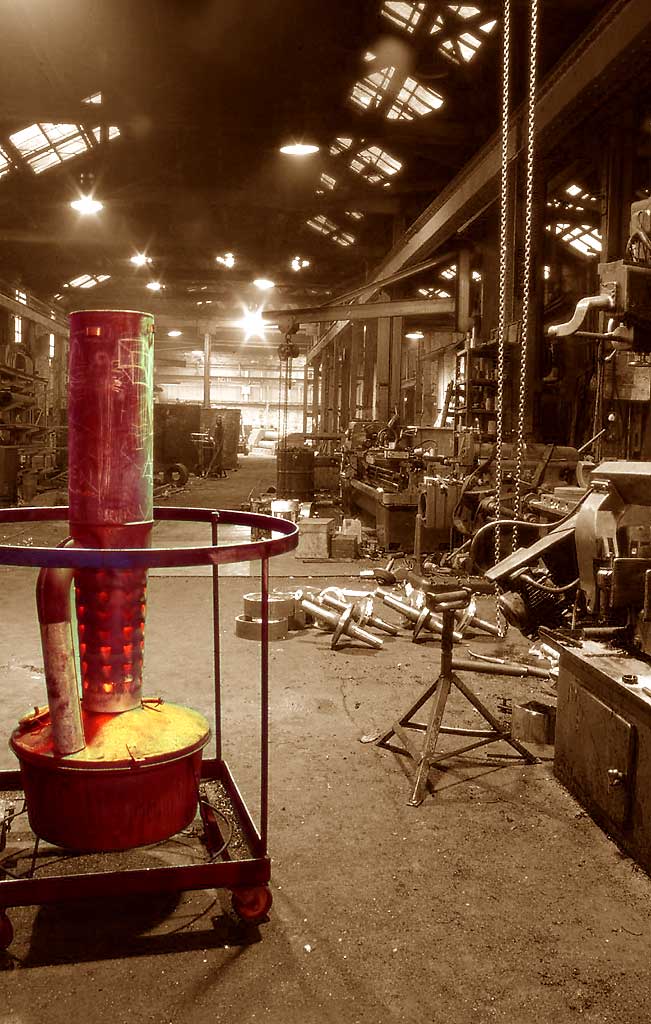
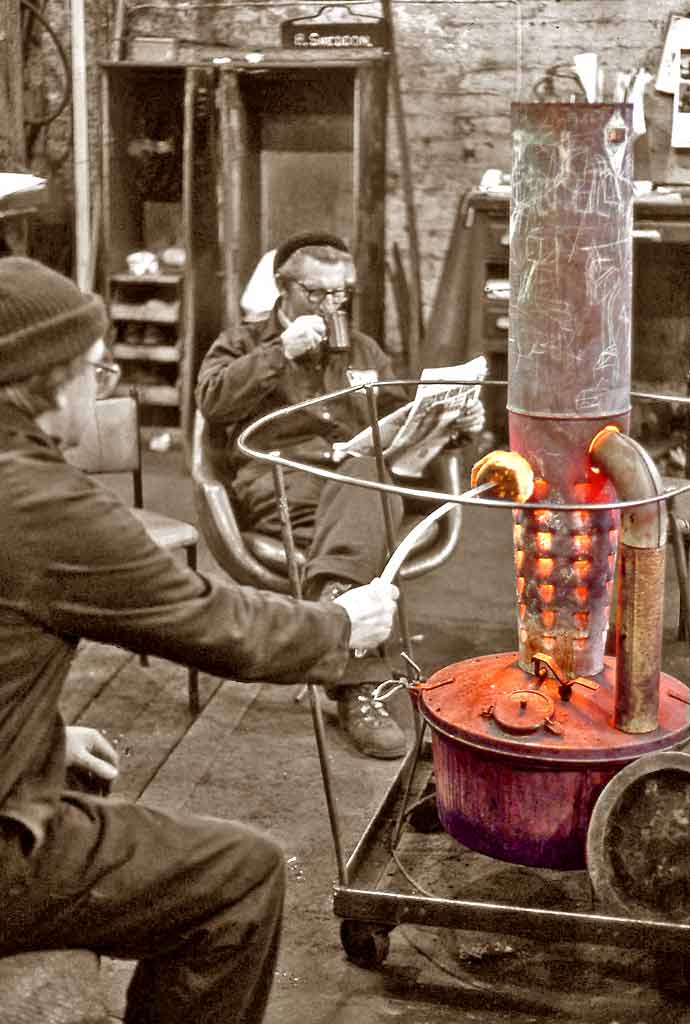
(c) Mixed Lighting Tungsten + fluorescent + daylight: - a challenge! Stevenson & Cheyne Engineering Works © Peter Stubbs. Please contact peter.stubbs@edinphoto.org.uk Photograph taken February 12, 1992 One solution Convert to Sepia and keep some colour © Peter Stubbs. Please contact peter.stubbs@edinphoto.org.uk Photograph taken February 12, 1992 More on the same theme Convert to Sepia and keep some colour © Please contact peter.stubbs@edinphoto.org.uk Photograph taken February 18, 1993
|
|
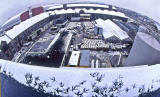
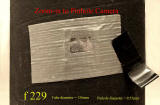
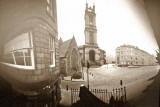
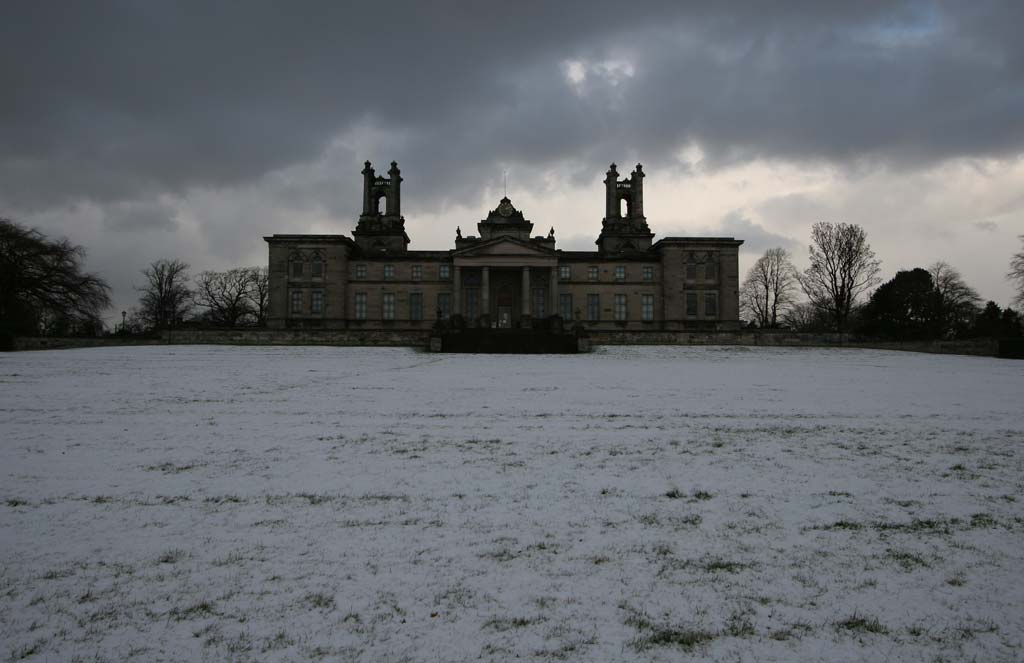
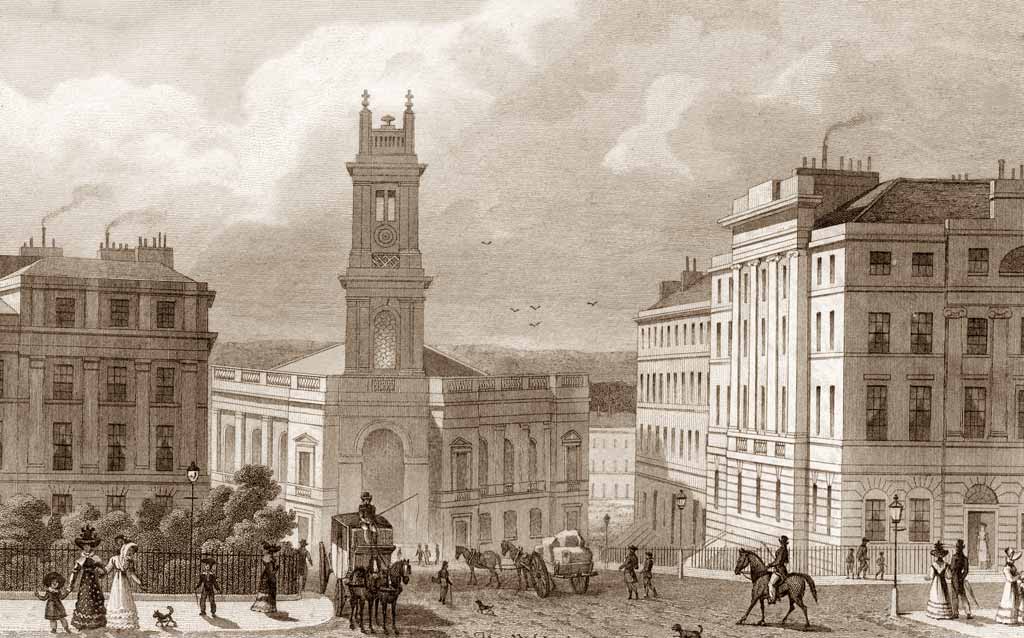
(d) Pinhole Photography St Stephen's Church Near Edinburgh Photographic Society Old engraving - Published 1829
© Copyright: For permission to reproduce, please contact peter.stubbs@edinphoto.org.uk Photo taken with the pinhole camera Weather bright: Exposure 25 minutes
© Copyright: Peter Stubbs - please contact peter.stubbs@edinphoto.org.uk Photograph taken 10.40am on April 29, 2007 Distortions The distortions in this photo are not because the photo was taken with a pinhole camera. They are due to the cylindrical shape of the photographic paper when it is in the camera. |
|
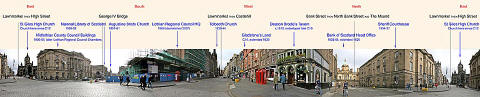
(e) Panoramas
© Copyright: For permission to reproduce, please contact peter.stubbs@edinphoto.org.uk
© Copyright: Peter Stubbs - peter.stubbs@edinphoto.org.uk Photograph taken on August 24, 2006
|
|
9 |


|
10. |
|
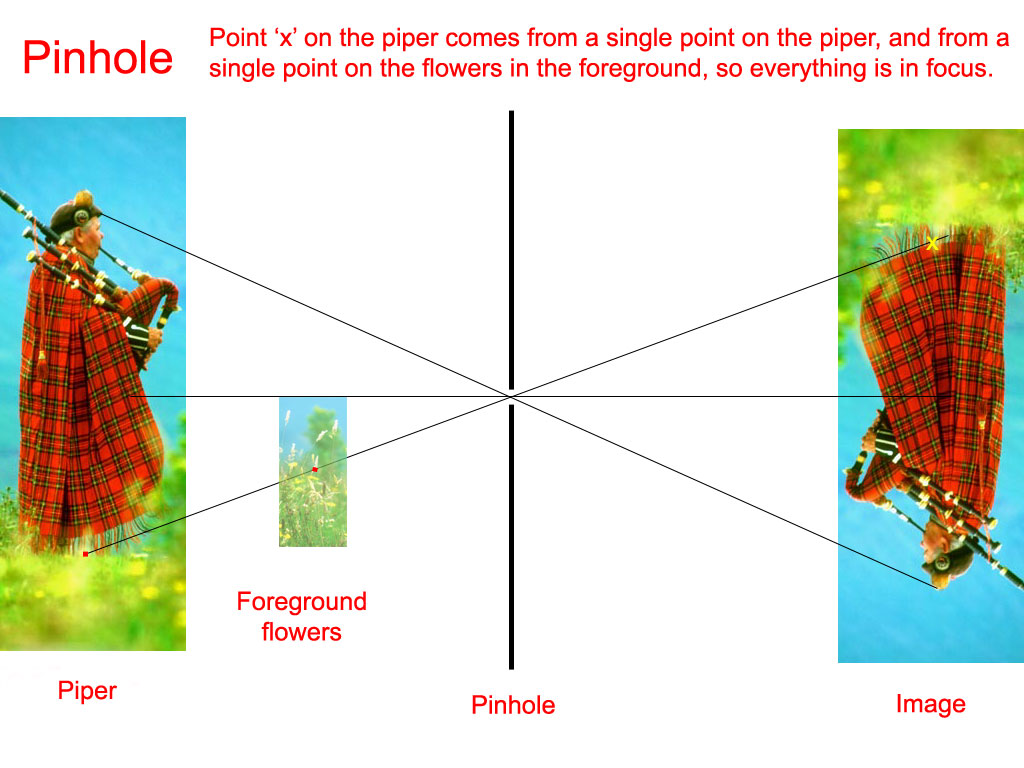
Depth of Field |
|
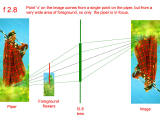
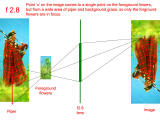
Everything is in focus
© Copyright: For permission to reproduce, please contact peter.stubbs@edinphoto.org.uk |
|
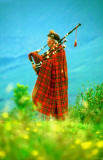
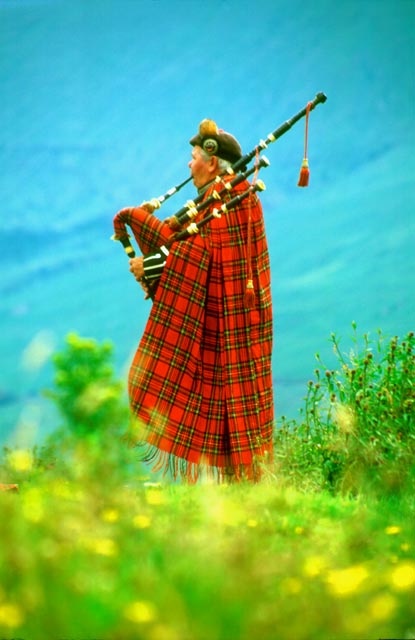
Piper in focus
© Copyright: For permission to reproduce, please contact peter.stubbs@edinphoto.org.uk |
|
Foreground flowers in focus
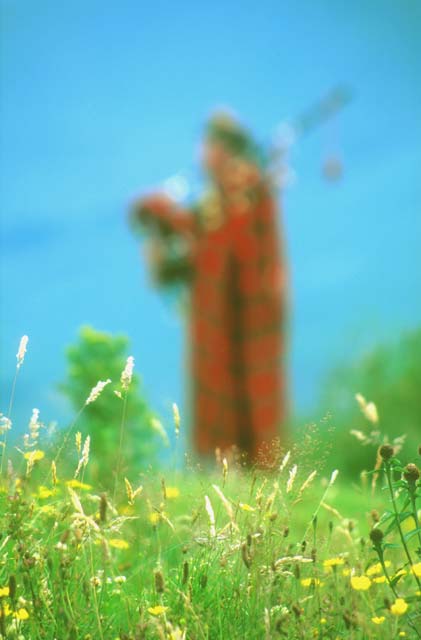
© Copyright: For permission to reproduce, please contact peter.stubbs@edinphoto.org.uk |
|
Everything just about in focus
© Copyright: For permission to reproduce, please contact peter.stubbs@edinphoto.org.uk
|


|
Talk to Midlothian Camera Club - PART 2: History of Photography |